A Comprehensive Guide to Retrobrighting Your Consoles and Bringing Back Their Original Glory
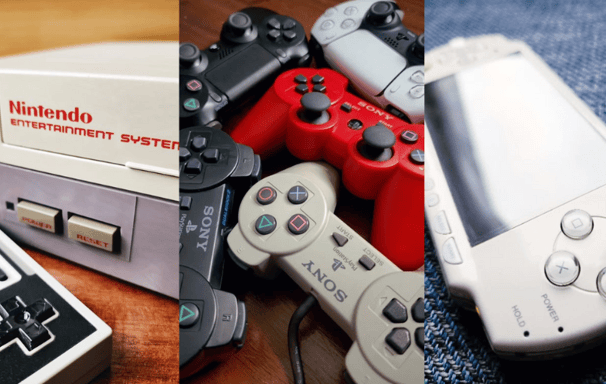
The retro gaming world is a treasure trove of nostalgia, with iconic consoles like the Nintendo Entertainment System (NES), Sega Genesis, and Super Nintendo (SNES) still holding a special place in the hearts of collectors and players alike. But over time, these beloved consoles begin to show signs of aging, and the once-pristine white and grey exteriors turn a sad, yellowish hue. If you’ve ever purchased a secondhand retro console, you may have noticed this discolored appearance, often caused by a process known as "bromine exposure." However, don't worry! There's a way to reverse this effect and bring your consoles back to their original, gleaming state. This technique is known as "retrobrighting," and with the right tools and methods, you can restore the consoles you love.
In this guide, we’ll walk you through the process of retrobrighting your retro gaming consoles using hydrogen peroxide. We’ll explore two different approaches: one that harnesses the power of natural sunlight and another that uses a UV light or lamp. Whether you’re a seasoned collector or just bought your first retro console, this article has something for you.
The Problem with Yellowing: Why Does It Happen?
Before we discuss the restoration process, it’s important to understand what causes retro consoles to turn yellow in the first place. Many vintage gaming consoles, especially those made from the 1980s to the early 2000s, were constructed using a plastic called ABS (Acrylonitrile Butadiene Styrene). While ABS is durable, it’s also sensitive to UV radiation. Over time, exposure to light, heat, and air causes the bromine in the plastic to break down, resulting in the yellowing effect we see on older consoles.
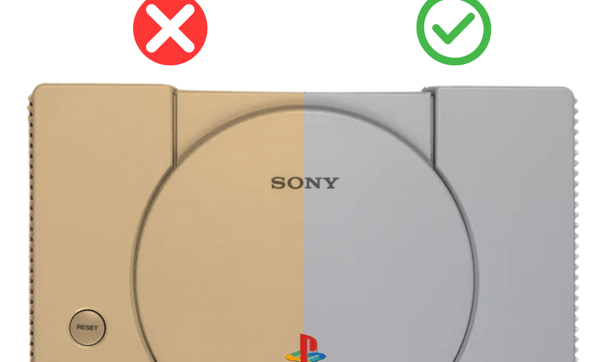
This discoloration can make consoles appear older and more worn than they actually are. For collectors, a yellowed console can dramatically lower its value. Fortunately, retrobrighting is a well-known solution that can help you restore the aesthetics and integrity of your beloved gaming systems.
What You’ll Need for Retrobrighting
Before we explore the techniques in detail, let’s go over the basic tools and materials you'll need for retrobrighting your console:
Hydrogen Peroxide Cream (Hair Developer, 12% or higher concentration): The main ingredient for retrobrighting. This type comes as a thick cream or gel, usually sold in beauty supply stores or salons as a hair bleach developer (look for volumes marked “40” — which equals around 12% hydrogen peroxide). The creamy texture makes it perfect for applying directly onto the plastic surface, and it stays in place without dripping all over your workspace.
Plastic Wrap or Clear Plastic Bag: After applying the hydrogen peroxide cream, you’ll need to cover the treated parts with clear plastic wrap. This keeps the cream from drying out too fast and ensures an even reaction during the process.
UV Light or Lamp (or Sunlight): Hydrogen peroxide needs UV light to activate properly. You can either let nature handle it on a sunny day or use a dedicated UV lamp for a more controlled setup — both methods work well.
Soft Cloth or Gloves: Always wear gloves when handling hydrogen peroxide cream, as it can irritate your skin. A soft cloth helps with cleaning the console before you start the process.
Now, let’s get into the two main retrobrighting methods!
Method 1: Sunlight Retrobrighting
The sunlight method is perhaps the most straightforward and natural approach to retrobrighting. It uses the power of UV rays from the sun to accelerate the reaction between hydrogen peroxide and the yellowed plastic. Here’s how to get started:
Step-by-Step Process:
Disassemble and Clean: Carefully take apart your console, removing all electronic components. Clean each piece thoroughly with a soft cloth and mild soap to get rid of dust, dirt, and oils.
Apply Hair Developer: Using gloves, apply a generous, even layer of the hydrogen peroxide hair developer to all yellowed plastic surfaces.
Wrap and Protect: Wrap the coated parts tightly in clear plastic wrap. This prevents the cream from drying out too fast during sun exposure and helps maintain an even reaction.
Expose to Sunlight: Place the wrapped parts outside in direct sunlight. Depending on the severity of the yellowing and sun strength, the process can take anywhere from 2 to 6 hours. Check occasionally to avoid overexposure.
Rinse and Dry: Once the yellowing has lightened, remove the plastic wrap, rinse the parts with warm water, and dry thoroughly before reassembling.
This method relies on the power of natural sunlight, making it a relatively low-cost and simple solution for retrobrighting. However, the results may vary depending on the intensity of the sunlight and the condition of your console.
Method 2: UV Light/Lamp Retrobrighting
For those who want more control over the process or who live in areas with inconsistent sunlight, the UV light or lamp method offers an effective alternative. UV lamps can provide a steady and reliable source of UV radiation, making it possible to restore your console at any time of the year. Here’s how to do it:
Step-by-Step Process:
Disassemble and Clean: Same as the sunlight method — be sure to disassemble and clean your console thoroughly to remove dirt, dust, or grime.
Apply Hair Developer: Same as the sunlight method — coat the yellowed plastic parts with the hair developer, making sure the surfaces are covered evenly.
Wrap and Protect: Same as the sunlight method — wrap the coated parts tightly in clear plastic wrap to prevent the developer from drying out too quickly under the UV lamp.
Use UV Light: Place the wrapped console under a UV lamp, positioning the lamp about 12 to 18 inches above the console. Make sure the light is steady and adjust the angle or distance as needed to ensure even exposure across all surfaces.
Monitor and Adjust: Allow the UV light to work for about 2 to 4 hours, depending on how yellowed the plastic is. Check the progress occasionally and reposition the lamp or console if needed for even treatment.
Rinse and Dry: Once the desired color is restored, remove the plastic wrap, rinse thoroughly with warm water, and dry completely before reassembling.
This UV light method offers a bit more precision than sunlight, as you can control the timing and exposure. UV lamps are widely available online and are an excellent investment for serious retro gaming restorers.
Tips for Achieving the Best Results
Use a High Concentration of Hydrogen Peroxide: A higher percentage of hydrogen peroxide (12% or above) will work more effectively than lower concentrations, which may take longer to show results.
Be Patient: Retrobrighting is a gradual process. It may take several hours or even days to fully restore your console, depending on the severity of the yellowing.
Avoid Overexposure: If you leave your console in direct sunlight for too long or expose it to too much UV light, you risk damaging the plastic. Always monitor the process to avoid overdoing it.
Restoring your yellowed retro gaming consoles through retrobrighting is a rewarding process that can breathe new life into your collection. Whether you choose to use sunlight or UV light, the key is to be patient and consistent in your approach. By following the steps outlined in this guide, you’ll be able to remove years of discoloration and bring back the iconic look of your beloved systems.
At Raised by Retro, we’re passionate about helping retro gaming enthusiasts restore their collections to their former glory. Be sure to follow us on The Console Quest for more tips, guides, and retro gaming content.
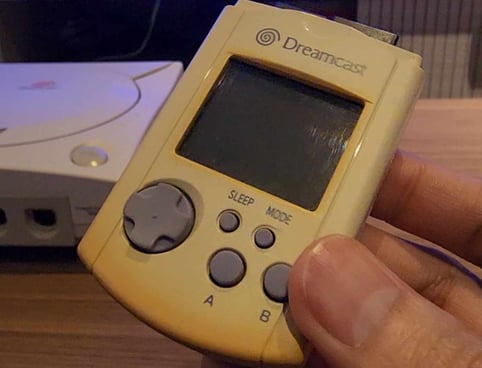
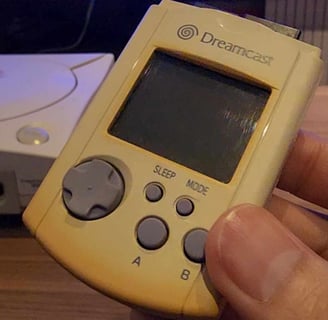
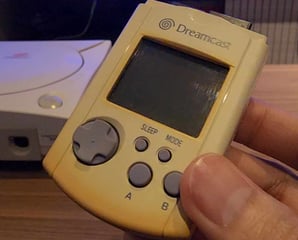
Heavily yellowed Sega Dreamcast VMU
The retro gaming world is a treasure trove of nostalgia, with iconic consoles like the Nintendo Entertainment System (NES), Sega Genesis, and Super Nintendo (SNES) still holding a special place in the hearts of collectors and players alike. But over time, these beloved consoles begin to show signs of aging, and the once-pristine white and grey exteriors turn a sad, yellowish hue. If you’ve ever purchased a secondhand retro console, you may have noticed this discolored appearance, often caused by a process known as "bromine exposure." However, don't worry! There's a way to reverse this effect and bring your consoles back to their original, gleaming state. This technique is known as "retrobrighting," and with the right tools and methods, you can restore the consoles you love.
In this guide, we’ll walk you through the process of retrobrighting your retro gaming consoles using hydrogen peroxide. We’ll explore two different approaches: one that harnesses the power of natural sunlight and another that uses a UV light or lamp. Whether you’re a seasoned collector or just bought your first retro console, this article has something for you.
The Problem with Yellowing: Why Does It Happen?
Before we discuss the restoration process, it’s important to understand what causes retro consoles to turn yellow in the first place. Many vintage gaming consoles, especially those made from the 1980s to the early 2000s, were constructed using a plastic called ABS (Acrylonitrile Butadiene Styrene). While ABS is durable, it’s also sensitive to UV radiation. Over time, exposure to light, heat, and air causes the bromine in the plastic to break down, resulting in the yellowing effect we see on older consoles.
This discoloration can make consoles appear older and more worn than they actually are. For collectors, a yellowed console can dramatically lower its value. Fortunately, retrobrighting is a well-known solution that can help you restore the aesthetics and integrity of your beloved gaming systems.
What You’ll Need for Retrobrighting
Before we explore the techniques in detail, let’s go over the basic tools and materials you'll need for retrobrighting your console:
Hydrogen Peroxide Cream (Hair Developer, 12% or higher concentration): The main ingredient for retrobrighting. This type comes as a thick cream or gel, usually sold in beauty supply stores or salons as a hair bleach developer (look for volumes marked “40” — which equals around 12% hydrogen peroxide). The creamy texture makes it perfect for applying directly onto the plastic surface, and it stays in place without dripping all over your workspace.
Plastic Wrap or Clear Plastic Bag: After applying the hydrogen peroxide cream, you’ll need to cover the treated parts with clear plastic wrap. This keeps the cream from drying out too fast and ensures an even reaction during the process.
UV Light or Lamp (or Sunlight): Hydrogen peroxide needs UV light to activate properly. You can either let nature handle it on a sunny day or use a dedicated UV lamp for a more controlled setup — both methods work well.
Soft Cloth or Gloves: Always wear gloves when handling hydrogen peroxide cream, as it can irritate your skin. A soft cloth helps with cleaning the console before you start the process.
Now, let’s get into the two main retrobrighting methods!
Method 1: Sunlight Retrobrighting
The sunlight method is perhaps the most straightforward and natural approach to retrobrighting. It uses the power of UV rays from the sun to accelerate the reaction between hydrogen peroxide and the yellowed plastic. Here’s how to get started:
Step-by-Step Process:
Disassemble and Clean: Carefully take apart your console, removing all electronic components. Clean each piece thoroughly with a soft cloth and mild soap to get rid of dust, dirt, and oils.
Apply Hair Developer: Using gloves, apply a generous, even layer of the hydrogen peroxide hair developer to all yellowed plastic surfaces.
Wrap and Protect: Wrap the coated parts tightly in clear plastic wrap. This prevents the cream from drying out too fast during sun exposure and helps maintain an even reaction.
Expose to Sunlight: Place the wrapped parts outside in direct sunlight. Depending on the severity of the yellowing and sun strength, the process can take anywhere from 2 to 6 hours. Check occasionally to avoid overexposure.
Rinse and Dry: Once the yellowing has lightened, remove the plastic wrap, rinse the parts with warm water, and dry thoroughly before reassembling.
This method relies on the power of natural sunlight, making it a relatively low-cost and simple solution for retrobrighting. However, the results may vary depending on the intensity of the sunlight and the condition of your console.
Method 2: UV Light/Lamp Retrobrighting
For those who want more control over the process or who live in areas with inconsistent sunlight, the UV light or lamp method offers an effective alternative. UV lamps can provide a steady and reliable source of UV radiation, making it possible to restore your console at any time of the year. Here’s how to do it:
Step-by-Step Process:
Disassemble and Clean: Same as the sunlight method — be sure to disassemble and clean your console thoroughly to remove dirt, dust, or grime.
Apply Hair Developer: Same as the sunlight method — coat the yellowed plastic parts with the hair developer, making sure the surfaces are covered evenly.
Wrap and Protect: Same as the sunlight method — wrap the coated parts tightly in clear plastic wrap to prevent the developer from drying out too quickly under the UV lamp.
Use UV Light: Place the wrapped console under a UV lamp, positioning the lamp about 12 to 18 inches above the console. Make sure the light is steady and adjust the angle or distance as needed to ensure even exposure across all surfaces.
Monitor and Adjust: Allow the UV light to work for about 2 to 4 hours, depending on how yellowed the plastic is. Check the progress occasionally and reposition the lamp or console if needed for even treatment.
Rinse and Dry: Once the desired color is restored, remove the plastic wrap, rinse thoroughly with warm water, and dry completely before reassembling.
This UV light method offers a bit more precision than sunlight, as you can control the timing and exposure. UV lamps are widely available online and are an excellent investment for serious retro gaming restorers.
Tips for Achieving the Best Results
Use a High Concentration of Hydrogen Peroxide: A higher percentage of hydrogen peroxide (12% or above) will work more effectively than lower concentrations, which may take longer to show results.
Be Patient: Retrobrighting is a gradual process. It may take several hours or even days to fully restore your console, depending on the severity of the yellowing.
Avoid Overexposure: If you leave your console in direct sunlight for too long or expose it to too much UV light, you risk damaging the plastic. Always monitor the process to avoid overdoing it.
Restoring your yellowed retro gaming consoles through retrobrighting is a rewarding process that can breathe new life into your collection. Whether you choose to use sunlight or UV light, the key is to be patient and consistent in your approach. By following the steps outlined in this guide, you’ll be able to remove years of discoloration and bring back the iconic look of your beloved systems.
At Raised by Retro, we’re passionate about helping retro gaming enthusiasts restore their collections to their former glory. Be sure to follow us on The Console Quest for more tips, guides, and retro gaming content.
Heavily yellowed Sega Dreamcast VMU
Related Stories
Join our retro gaming community and get weekly updates, deep dives, and hidden gems—straight to your inbox!